Friday, August 15, 2014

Sneak Peak

So, we decided to send a few sneak peaks your way. We are still working in our rooms, organizing, and hanging stuff. So, we thought a sneak peak of our rooms would be AWESOME! It seems like every day we make more of a mess cutting lamination and doing other tedious tasks that we never have a clean room for pictures. So, we decided that we could get pictures done next week before open house.


You can find the Read banner in my Rainbow Chalkboard Complete Alphabet Decor Set herehttp://www.teacherspayteachers.com/Product/Rainbow-Chalkboard-Complete-Classroom-Decor-Set-1373674 


This is one of my new additions. It has two sides and they are both full of book baskets. I will have 44 students total. Last year I had desks for each student. Since they will be sharing their seat with another class, I decided to change to tables. They were offered and I snatched them up. The only problem is that they don't have any where to place their things. Eeeeek! This is why I needed this beauty! It had a ledge on the top and I had to put it to use. The students comprehension warm ups and their phonics notebooks are stored here.

The rest of my pictures didn't load so this will be it for now!

Tuesday, August 12, 2014

Daily 5 Freebie!

Go to our TPT store for your free daily 5 clip chart. I decided to leave this up as a freebie for now.
 http://www.teacherspayteachers.com/Product/Daily-5-Clip-Chart-1387736.


Tuesday, July 29, 2014

Bright Happiness

Paint.  Yard sales.  Dollar Tree.  Fabric.  Ribbon.  Border.  Contact paper.  Burlap.  My debit card.  Oh MY! 

It’s that time of year again.  Crazy busy, rush to enjoy the last moments of summer all while obsessing with getting your classroom ready for the new school year.  I absolutely love this time of year.  We get a fresh slate, a new opportunity to do things differently.  And I love the smell of school supplies.  Weird, I know.  Sorry, but not sorry.  It’s the teacher in me.
 
ANYWAY, on to the subject at hand.. I have been working feverishly on my classroom and classroom projects.  I took a HUGE leap this year.  I have moved away from primary colors.for a FOR.EV.ER. lover of RED, that’s a huge leap. 
I have gone BRIGHT.  Turquoise, hot pink, lime green, yellow, and burlap. With chevron and polka dots.    

 And I LOVE it! 

My entire classroom is getting a massive makeover.  Projects have ruled my summer.
As luck would have it, I found an awesome rocking chair at a yard sale for  a whopping $10.  Yep, $10.  Did I NEED a new chair?  Nah.  But, come on.$10?!  I had to bite. 

So, this project began.  I almost completely forgot to take a before picand if you look closely, you will see I had already started sanding.  I removed the cushions. (Sorry, I DID forget that before pic).  They were a horrid 70-early 80’s pastel paint fabric yuckiness.

 Gag me with a molded spoon. 


Sooooo…… after lots of sanding and TONS of sweating in this Texas heat. I painted it turquoise.  Then, recovered the cushions in a hot pink and white polka dot.  And there you have it.


Pure and simple.


Bright happiness.

Makes me smile.  BIG. 

Happy Tuesday! 
      ~Robin  
Tuesday, July 15, 2014

2013 Classroom Pics, Monster theme, and Peach Pie Goodness


It's that time of year again.  Time to re-organize and re-decorate to get your classroom ready for all the fresh faces that will be arriving in a few weeks.  Unfortunately, this years' room is not ready yet.  So, I thought I would do a flashback post.  After all, it's flashback Tuesday,  isn't it?  Wait, that's Friday.  Oh well.  We are flashing anyway!!

Before the big reveal, I must give you a little background knowledge.  It's the teacher in me.  Last year, in May, I had absolutely no plan or intention to go back to teaching.YET.  I was working part-time at our church as the secretary and homeschooling my boys.  I had been out of public school teaching for two years (I had a child with a medical issue). 
I was content.
 
Then my baby sister moves back to town and lands her first job at the local elementary.  That was a total game changer.  My child was doing great and dying to go back to public school and I had an opportunity to work at the same school as my sis.  I called to see if they had another opening and the rest is history.
 
Why did I tell you all that, you ask??  Well I had to sprint to get a classroom ready.  Although I was hired at the beginning of summer, I had a summer full of plans that did not include classroom decor.  Plus, I would be teaching Kindergarten for the first time in 10 years!! So, I’ve said all this to say.. I threw this room together with a lot less prep than usual.  There were lots of things I LOVEDand lots of things I didn’t.

Since we have just started this blogging bees-wax, I thought it would be good to share last years classroom pics.  I absolutely love looking at other teachers’ rooms and gleaning ideas from them.  So here we go. I hope you enjoy.    


View from the front door.  Can you tell I have a BRIGHT and BUSY personality??


This is right inside my door.  It is my main work area for morning classroom business.  This houses my emergency plans/forms, breakfast and lunch forms, nurses slips, lunch tags, etc.  Students drop any money or notes here as they enter the room. 


This board is also right inside my room.   It is the home to our class rules, how we get home, class jobs, and morning work routine.  The shelf with the polka dot fabric houses lunch kits and behavior folders.  The fabric only lasted through Meet the Teacher because it was in the way!  But it surely looked cute!  


We are blessed in my district with lots and lots of storage space.  Besides this area, I also had a walk-in closet to share with my neighbor teacher next door.  With the help of my sisters, we sewed the curtains to hide all the teachery chaos in the cabinets.  The mailbox area is also home to pencils, erasers, etc, etc.


The table in front of the word wall is a small, two-seater and it came in handy for those who had self-control issues.  You can also catch a peek at my block center to the right.


The rug area.  This is where the magic happens, people!  I


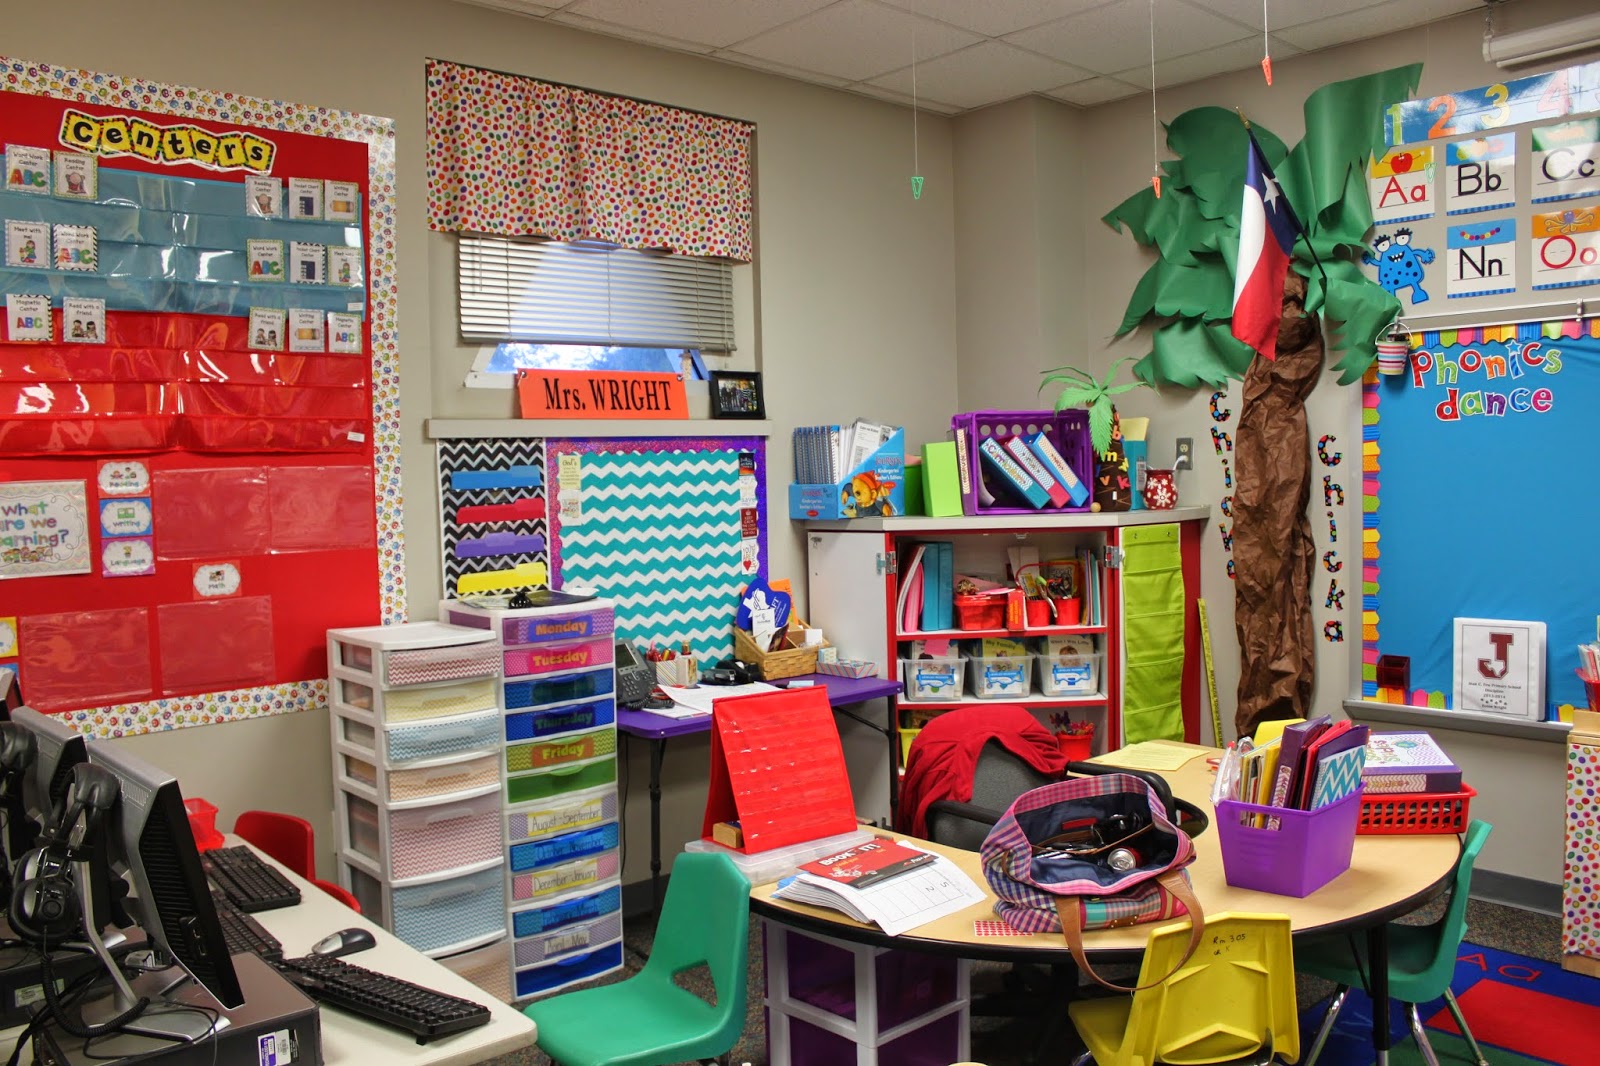
This is a combination of a teacher corner, my guided reading table, and student computer station.  I would like to say it doesn't usually stay this cluttered, but I would be struck down by lightning for sure.  Let's just say I'm an orginizational work in progress!  


This is my classroom library.  My monster tent is definitely adorable and yes, I know..... it looks like a ladybug.  Actually is WAS a ladybug until I labored to attach mullti-colored felt polka dots, furry strips, and even horns (look closely).  I was hoping beyond hope to transform it into a Monster tent, but everyone just loved the ladybug!  eeeekkk!  Oh, well, you can't win them all.  I guess.  


This is my display board for the hall.  It didn't make it too long because I am the last classroom next to the back doors, so the sun faded it pretty quickly.  


Well, I couldn't dare end this post without a little yummy goodness.  I am in love with McDonalds' strawberry cream pies.  But guess what?  They quit selling them.  Boo.  But guess what??  They started selling peach cream pies.  And I must say, YUMMO DELICIOUSNESS!!!  

                                         ~  Robin 


Sunday, July 13, 2014

Crazy Weeks Ahead!

I am typing this just after laying out clothes for 3 girls, all excited about one thing. Well, maybe two things! First, they are having sleep over #1 without the boys. The boys are staying at grandma's house (across the street). Why do girls love having their own space? The boys could care less about the girls being in their room and in fact, they like it. However, the girls want them GONE, OUT, AWAY! It is like they are carrying a virus that is highly contagious! Second, tomorrow is the start to VBS at our church. The cousins (Ashley's kiddos) are staying all week for the occasion. 

I am STOKED after a day of decorating and studying the lesson OVER and OVER! Why do I get nervous about VBS when I teach kids on a daily basis? Anyways, after we finished decorating, we had COFFEE! You should have guessed that one. My sisters and I have a love for coffee that is just WEIRD! Then, it happened! I talked my sister into letting my babysit all the kids while they ran to Wal-Mart. I had all 6 kids including little Levi. I am officially his first baby sitter. He loves me more than Robin already. Don't tell Robin I mentioned it because she is super jealous. 

This week we have a night to cook between all of us, camping out, movie under the stars, craft night at a local business, and next week we are going for real camping. Ahhhhhhhh........... I love summer. I am hosting mexican night at my place on Tuesday. I plan to teach the kids how to make chessecake chimichanga's. Shhhhhhhh..... It's my first time to make them too. They will never know. Here is the link to the recipe below.

http://www.justataste.com/2013/06/strawberry-cheesecake-dessert-chimichangas-recipe/

It looks so yummy! I think they will love it.  I will post pictures of our craziness and fun times soon. Please leave a comment if you have tried this recipe. Have a great week!


Wednesday, July 9, 2014

Say Goodbye to the Ugly Grey File Cabinets!!!!!

I have planned to cover my file cabinets with contact paper for over a year. However, I never could find any that I LOVE! Then, the chevron fad came in which I am obsessed with and BOOM! School Aids was selling rolls of chevron contact paper. Robin made a trip to Beaumont and was going to swing by the teacher store for a few things. Bhuahahahahahaha! I said a FEW things! I am a little happy since I just had a slice of fruit pizza. Yumm-o! So, she got more than a few things but, I love her because she got me a few of those things too. She picked up the black and white for me and a chevron anchor chart. Who would have thought it? :) I went to the school today to finish leveling my books! Another post to come on all the jazz! I was sick of looking up books, labeling, and organizing. The chevron contact paper was staring at me. It was just sitting there on the green table and it looked so sad. So, the makeover began!

Materials Needed:
- Scissors
-contact paper of your choice
- yard stick or measuring tape
- screw driver
- credit card or license (for smoothing the paper)

1st step:

Empty all of the drawers and take them out of the cabinet.


2nd Step:

This depends on your file cabinet! Mine had a black cover with two flat head screws on it. I unscrewed it and it popped out. Then, you can just slip the hardware out of its position. You need to remember how to put it back so that your drawers open properly. I did one at a time so that I could look at one to figure out how it went back together.

3rd Step:
Measure the drawer and add an extra half inch to tuck it on the sides. Measure the contact paper and cut it to fit.

4th Step:
Stand the drawer up so that it’s easier to hold onto. I started with the corner of the contact paper pulled just about an inch of it back and stuck it to the top of the drawer. Use the credit card, slide it back and forth as you pull the paper down and stick it to the drawer. I pulled a little at a time and went over it with the card pressing firmly. If you see any bubbles, just run the card over them until they are gone. When you get to the bottom, check for bubbles. Smooth out any that you see with the card. Then, tuck the sides.


5th Step:
Put the hardware back on the drawer and put your drawer back in the cabinet!

6th Step: Admire your creation and enjoy!

Now is the perfect time to organize the files you are putting back into it. :0


By: Mollie Clark

 
Monday, June 30, 2014

Classroom Pics

Now is the time that we are all thinking about our classroom design for the new school year. I am sharing our classroom pictures from last year! Robin is moving to 1st grade which means a new room. So, she is completely recreating her room. I am keeping everything the same with some added chevron (yes, I am obsessed with it like everyone else), more pink and purple, and less Dr. Seuss. I guess I could sum mine up by saying I am going to a rainbow color scheme with polka dots and chevron. We will have a post soon on the new rooms. I need to concentrate on what I started this post about. I am bad about getting side tracked with my million ideas chasing each other in my head. Back to last year’s set up.

Mollie's Room---

Before


After


This is the view coming in my door. Keep in mind that these pictures were from the beginning of the year. It didn't stay this neat!


This was by far my student’s favorite place in the room. I went with a Dr. Seuss theme. So, when I found the turtle tent at Ross for $10 I had to buy it. The title for the library was come read with Yertle the Turtle! Truffula trees were made from a pool noodle, duck-tape, and feather boas. I found the plush characters at Kohls. They loved the tent. I used it as a motivational tool for good behavior. I drew numbers and one child would be chosen to read in the turtle tent during literacy centers the next day. The students who had bad behavior marks lost their chance to read in the tent. Every day they had another chance to do well and be drawn for the tent. I did cheat when necessary to ensure the students who needed the motivation received on days they worked extra hard. :0  


I love having my rug area. I refused to give up this space. I am so glad I didn’t because I HAD to purchase a NOW board to include more technology in my instruction. Yes, I bought it myself and I haven’t regretted it yet. I placed duck-tape on the rug where each student’s assigned seat would be and wrote their name with permanent marker. I didn’t write the names until we were about 2 weeks into school. We did a lot of moving around because of talking. L


Please ignore all of the baskets. I took this picture right before open house. I labeled them for parents to place school supplies in as they walked in the room. I had signs with numbers for each step to complete while I was meeting parents.  The table with the skirt I used as my material table. I had post it notes taped down for each block of time. I would lay out the items needed for that lesson by its time. This way if I was absent, anyone could walk in and run my room. 


In this pic you see my pocket chart that I use for phonics instruction. I LOVE using my pocket chart. I build words by each sound and we do a drill every day of the alphabet sounds. That is one of my designated “jobs” for the students. They get to pick a pointer and run the drill while the class echoes. Did you notice my Dr. Seuss calendar wall? That’s another job that is done first thing in the morning.That’s another job that is done first thing in the morning. The small pocket charts I bought at Target before school started and I use those for spelling words and sight words of the week.


Please excuse the papers as it was for open house. J This is my guided reading table. I had chair pockets on these to hold supplies like dry erase boards, markers, letter tiles, and math manipulatives. I placed my table by this shelf because I stored all of my reading A-Z book in the baskets. I thought I would need it where I could reach them but….. I always pulled the books on Friday before the previous week and kept them in a chair pocket. I like for them to be labeled and organized.


Don’t look ETHEL!!! I sewed these curtains to match my color scheme. I LOVE looking at them every day. I also clip anchor charts on them with safety pins. You can never have too much wall space.

I love my tool kit. I bought this at Lowe's and painted it. I got this idea off of Pinterest from another great teacher. I have no idea who originally came up with this idea but they are a genius! I never had to dig in my desk drawers for the little things.

That is all of the pictures I have for now. I will be updating this post with pictures after I do my room make over.